Growing Guide
Sunny, sheltered position is best - protected from Spring frosts. Plant 4-5m apart from other apricot trees.
3cm
4-5m
4-5m
10cm
28
Planting time for apricot seeds from pits is signalled once you see some roots emerge.
Pot the sprouting seeds.
Put one seed per 4-inch pot filled with potting soil with the root end down.
Keep the growing apricots from seed in a sunny window, under grow lights or in a greenhouse until they get bigger, and it is time to transplant them out into the garden.
With luck and patience, you will be rewarded with sweet, juicy apricots from your own tree in three to five years.
Choose a sunny spot in fertile, well drained soil.
Late autumn and winter is the best time to plant apricot trees in New Zealand.
Sunny, sheltered position is best - protected from Spring frosts.
Plant 4-5m apart from other apricot trees.
Prepare your soil with organic matter like compost and sheep pellets.
Add a layer of citrus & fruit mix to plant into.
Feed your apricots in spring and summer to encourage maximum flowering and fruiting.
Apricot trees can be ‘espalier’ trained against a wall or fence in a fan shape.
Water well, particularly over the warmer months.
The best homemade citrus fertilizer should be acidic and have a high amount of nitrogen, phosphorus, and potassium as well as calcium, iron, zinc, and magnesium.
You can get many of these nutrients from coffee grounds, banana peels, Epsom salts, grass trimmings, and more.
Growing Apricot in pots is a perfect choice for gardeners with limited space.
You can go with dwarf varieties like; ‘Stella,’ and ‘Stark Golden Glo.’ Though you can grow any apricot as a dwarf, by pruning and keeping it small.
A pot with 20-24 inches diameter is ideal for growing apricot in pots, but if the plant is small or you’re growing it from seed then start in a small pot.
Once it is root-bound, keep re-potting to the bigger pots.
Use a commercial potting mix with a neutral pH of 6-6.5.
Tip: Some of the best varieties to grow are Alfred and Flavourcott, Stella, Stark Golden Glo, Tomcott, New Large Early and Isabelle, Moorpark, and Goldcott.
As the plant enjoys a bright sun, it is always a good idea to place the pot in a sunny spot.
While growing apricot in pots indoors, locate it near or on a south-facing window.
Use a good quality commercial potting soil to plant apricot or prepare your own by mixing 1 part coarse sand, 1 part perlite, and 1 part peat moss or coco peat.
To make it rich, add 1 part compost or aged manure.
Take pots with proper drainage holes.
During the growth phase, apricot requires consistent watering.
In cold regions, you can water once a week, whereas, in hot climatic conditions, 2-3 times a week is going to be sufficient.
In summers, you will have to water them more frequently.
Tip: Keep the soil moist, but not soggy.
They enjoy consistent moisture but avoid keeping the soil too dry or too wet.
While growing apricot in pots, prune the tree twice a year–once in spring, and again in summer.
Snip off about one-quarter of the new growth each time.
Also, remove leggy, damaged, or diseased branches as soon as they are noticed.
Regular pruning is going to keep the apricot tree in the desired size and shape, encouraging new growth and fruit production.
Tip: If you don’t want it to grow tall in pots, maintain the smaller size by pruning.
Within the first 12 months, and then every 2-3 years, you have to re-pot the plant.
While repotting, ensure that the soil is moist.
Holding the base of the main stem, pull the plant out of the container, after loosening the soil at the edges.
Add compost and fresh potting soil to the new pot.
Do ensure that you are watering the plant well for the coming weeks.
Sunny, sheltered position is best - protected from Spring frosts.
Plant 4-5m apart from other apricot trees.
Prefers well drained soil.
Water well during the early stages, during long dry periods and when the fruit is developing.
Apricots perform best in temperate areas with dry spring weather.
Most varieties need plenty of winter chilling but there are low chill selections available which are more suitable for warmer areas.
Prune only during Summer after fruiting to minimise the chance of infection and bacterial canker.
Paint all cuts with pruning paste.
Fruit ripens from early to late summer.
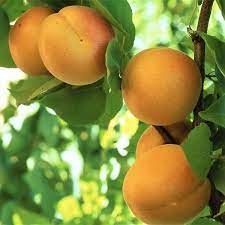
Apricots are ready for picking from early summer and taste best when they are left to mature on the tree.
Ripe apricot fruit will feel a little soft when cupped in the hand.
Pick with care to using secateurs to prevent bruising and damage to fruit spurs.
Birds will also enjoy tucking into apricots and can smell a ripe one from quite a distance, Netting may be required to deter birds when fruit is ripening.
To begin your apricot seed planting, choose a luscious mid- to late-season type of apricot, ideally one that was grown from seed itself.
Eat the fruit; actually eat a few to raise the chances of germination, and save your pits.
Scrub any flesh off and lay them out on newspaper for three hours or so to dry.
Now you need to get the seed out of the pit.
Use a hammer gingerly on the side of the pit to crack it.
You can also use a nutcracker or vice.
The idea is to get the seed out of the pit without crushing it.
If you are in doubt that any of these methods will work for you, as a last resort, you can just plant the entire pit but germination will take longer.
Once you have retrieved the seeds, allow them to dry on the newspaper for a few more hours.
You can now store them in a cover jar or zip-top plastic bag in refrigerator to stratify the seeds for 60 days.
Whether to stratify or not depends on where you obtained the fruit.
If purchased from a grocery store, the fruit has already been cold stored, so it is less likely to need to stratify; but if you bought them from a farmers market or plucked them directly from a tree, it is necessary to stratify the seeds.
If you are not going to stratify the seeds, wrap them in a clean, damp paper towel and place them in a plastic bag in a window.
Keep an eye on it.
Water as needed to keep it moist and change the paper towel if it begins to mildew.

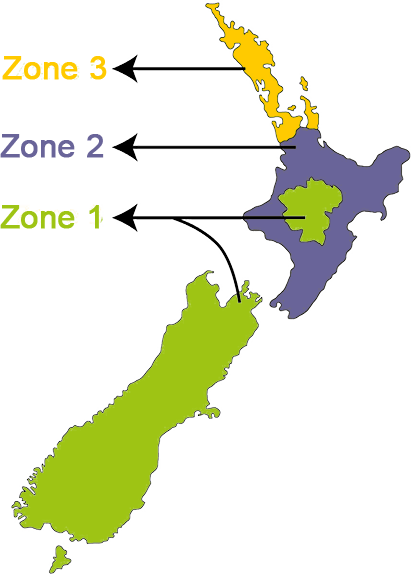
Zone 1 - Cool
April , May , June , July , August , September
Zone 2 - Temperate
May , June , July , August , September
Zone 3 - Subtropical
May , June , July , August , September
Pests
Problems